Experiments with Vibrance HDR
I've been using the Vibrance HDR app for a few weeks now, and though it is fairly simplistic in its offerings, it does the job quite well, actually, and I highly commend the app developer for making such a reliable app that gets the job done in under 10 MB!
The app is built to work well with OpenCamera's Exposure Bracketing option, although I've successfully been able to get it to process images taken by my DSLR as well. It can support up to 7 different exposures to create a working HDR image; however, this depends on your phone's specs. My phone unfortunately doesn't have a lot of RAM (only 2 GBs) so I was limited to the minimum of just three. Still, it accomplishes what it sets out to do: be a true HDR app that merges exposures (rather than the "fake HDR" method of applying whacky filters) with not too many extras. There are some basic post-processing sliders you can use to adjust the image, but it doesn't beat further editing in a proper image editing program.
The app is remarkably easy to use, and you can get a pretty snazzy (or at least, reasonably acceptable) HDR image in just minutes! ...Not to shamelessly advertise this app, but I liked it.

The app is built to work well with OpenCamera's Exposure Bracketing option, although I've successfully been able to get it to process images taken by my DSLR as well. It can support up to 7 different exposures to create a working HDR image; however, this depends on your phone's specs. My phone unfortunately doesn't have a lot of RAM (only 2 GBs) so I was limited to the minimum of just three. Still, it accomplishes what it sets out to do: be a true HDR app that merges exposures (rather than the "fake HDR" method of applying whacky filters) with not too many extras. There are some basic post-processing sliders you can use to adjust the image, but it doesn't beat further editing in a proper image editing program.
 |
 |
 |
 |
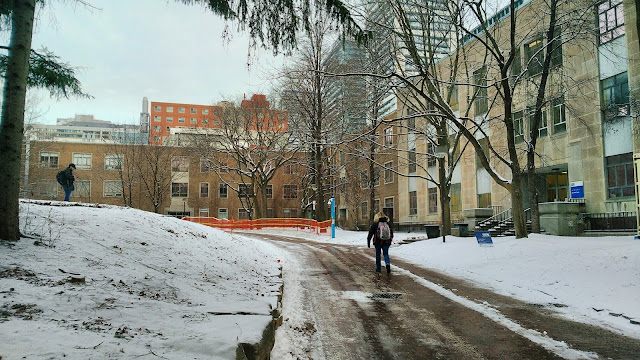
| Snow on Bond Street |
To start, here are the three exposures we're going to merge together with this app into a nice HDR image. These photos were taken using the Exposure Bracketing feature on the OpenCamera app, which quickly takes three pictures, each at different exposure levels, and saves them all onto your phone with the idea that you'll process them later into an HDR image.
 |
| -2 step exposure (underexposed) |
 |
| 0 step exposure (normal exposure) |
 |
| +2 step exposure (overexposed) |
The app has a rather unimpressive interface when you first start it. There are two buttons that might confuse new users to the app: "Open Photo(s)" and "Open Recent Photo(s)". "Open Recent Photo(s)" lets you open photos that you've recently added to your device, and uses the app's own menus to scroll through your files. "Open Photo(s)" lets you access your images by folders and uses Android's menus to scroll through.
I do not keep images on my phone for very long (I delete them after I'm done with them and after they've all gone to Google Photos) so "Open Recent Photo(s)" generally gets all of the images I care about.
Here, I select the images I want to merge together on my phone. I can select up to three.
As soon as you open the photos, the app will get straight to work processing the images and will present to you an HDR image right away.

The app offers some simple tools to edit the image after processing. These get the basics done, but don't beat further editing in a proper image editing program. You can at least adjust the brightness:
The contrast:
The colour saturation:
The white balance temperature:
Contrast enhancement strength:
And the contrast enhancement detail:
At any point in time, you can tap the "AB" button at the top-right of the screen to view the original image.
 |
| Edited |
 |
| Original |
And voila! An HDR image that, while it may not be the best quality out there, is at least your very own true HDR image, made entirely with free software.


Comments
Post a Comment