HDR, or high-dynamic range, is a way of making photos look brighter and more realistic by combining different exposures together to make a picture that would look more like what a human eye would see.
The
exposure of the photo is how much light reaches the image sensor of the camera to produce an image. Lowering the exposure results in
less light reaching the sensor, and as such will produce a darker image. Raising the exposure results in
more light reaching the sensor, and will produce a brighter image. Most cameras these days automatically adjust the exposure settings based on what you point them at. If you point the camera at a bright object, it will lower the exposure setting so that the image doesn't become too bright. If you point the camera at a dark object, it will increase the exposure setting so more light can reach the sensor so it can create an image of that object.
Putting that jargon aside, let's say you wanted to photograph a street with a bright, overcast sky above you. Here's the problem, though: the exposure setting of a camera applies to each individual image the camera takes, and it's not possible for a camera to have multiple exposure settings for different parts of the same image. What usually happens is that, if the camera's exposure is adjusted for the sky, the street becomes dark and barely visible, whereas if the exposure is adjusted for the street, the sky disappears into an ugly, plain white canvas.
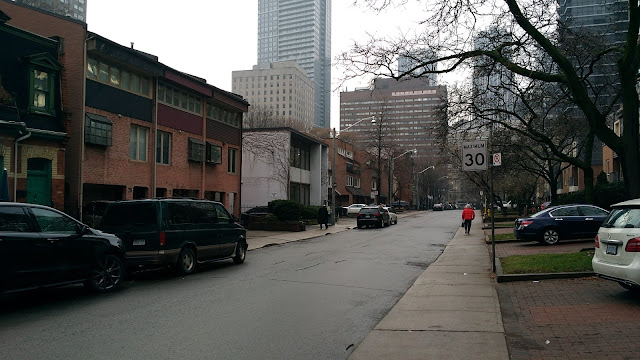
Take a look at this photo. This was photographed on Granby Street just west of Church Street in Downtown Toronto, using my smartphone camera.
This photo represents just about everything that could go wrong with exposure settings. The street looks much darker than it actually was at the time I took the photo, and the cars on the bottom-left look pretty shady (even though they weren't). At the same time, the overcast sky is completely white—no details can be seen at all!
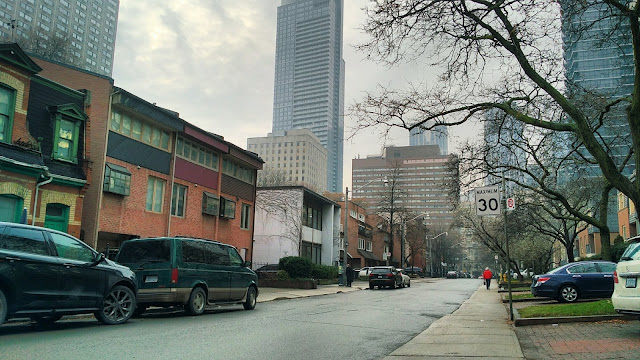
Most smartphones these days have an HDR mode that takes three pictures consecutively—each at differing exposures (one normal, one overexposed, and one underexposed)—and then merges those images together on the spot to make an HDR image that gives you the best of all worlds. Shortly after taking the photo above, I turned on HDR mode and took the following picture.
Looks a bit better, doesn't it? Not as dull and a little more colourful. Plus, you can actually see some detail in the clouds above!
Although my smartphone cameras—a Samsung Galaxy Grand Prime and an Asus Zenfone 3 Laser—support this form of HDR photography, my DSLR—a Nikon D60—does not. Many DSLRs these days have an Automatic Exposure Bracketing feature that quickly takes the three (or more) photos at differing exposures with one click of the shutter for you to run into an image editing program later, but sadly the D60 doesn't have that either, so you have to take all of those different exposures by hand. My dad gave me a copy of CyberLink PhotoDirector 5 which had an easy-to-use Bracket HDR feature that can take up to five images and will blend them together to make a true HDR image by combining different exposures into one image. I'm aware of the
Exposure Blend plugin for GIMP too, but (to be honest) it does leave images looking a little bit too flat.
The weather these past few days has been disgustingly overcast and miserable, so when the weather finally cleared up to reveal cloudless skies I just had to grab the tripod and the DSLR to test this feature out for once.
(NB: I'm not a professional photographer and I never took any photography courses. I was mostly experimenting with this and had some fun with it.)
For my first scene I took five photos, each at differing exposures. (Exposures are measured in "steps", and a negative step means
lower exposure, and thus a darker photo) I used a tripod to keep the camera steady so as to minimize movement between photos.
 |
| -2 step |
 |
| -1 step |
 |
| 0 step |
 |
| +1 step |
 |
| +2 step |
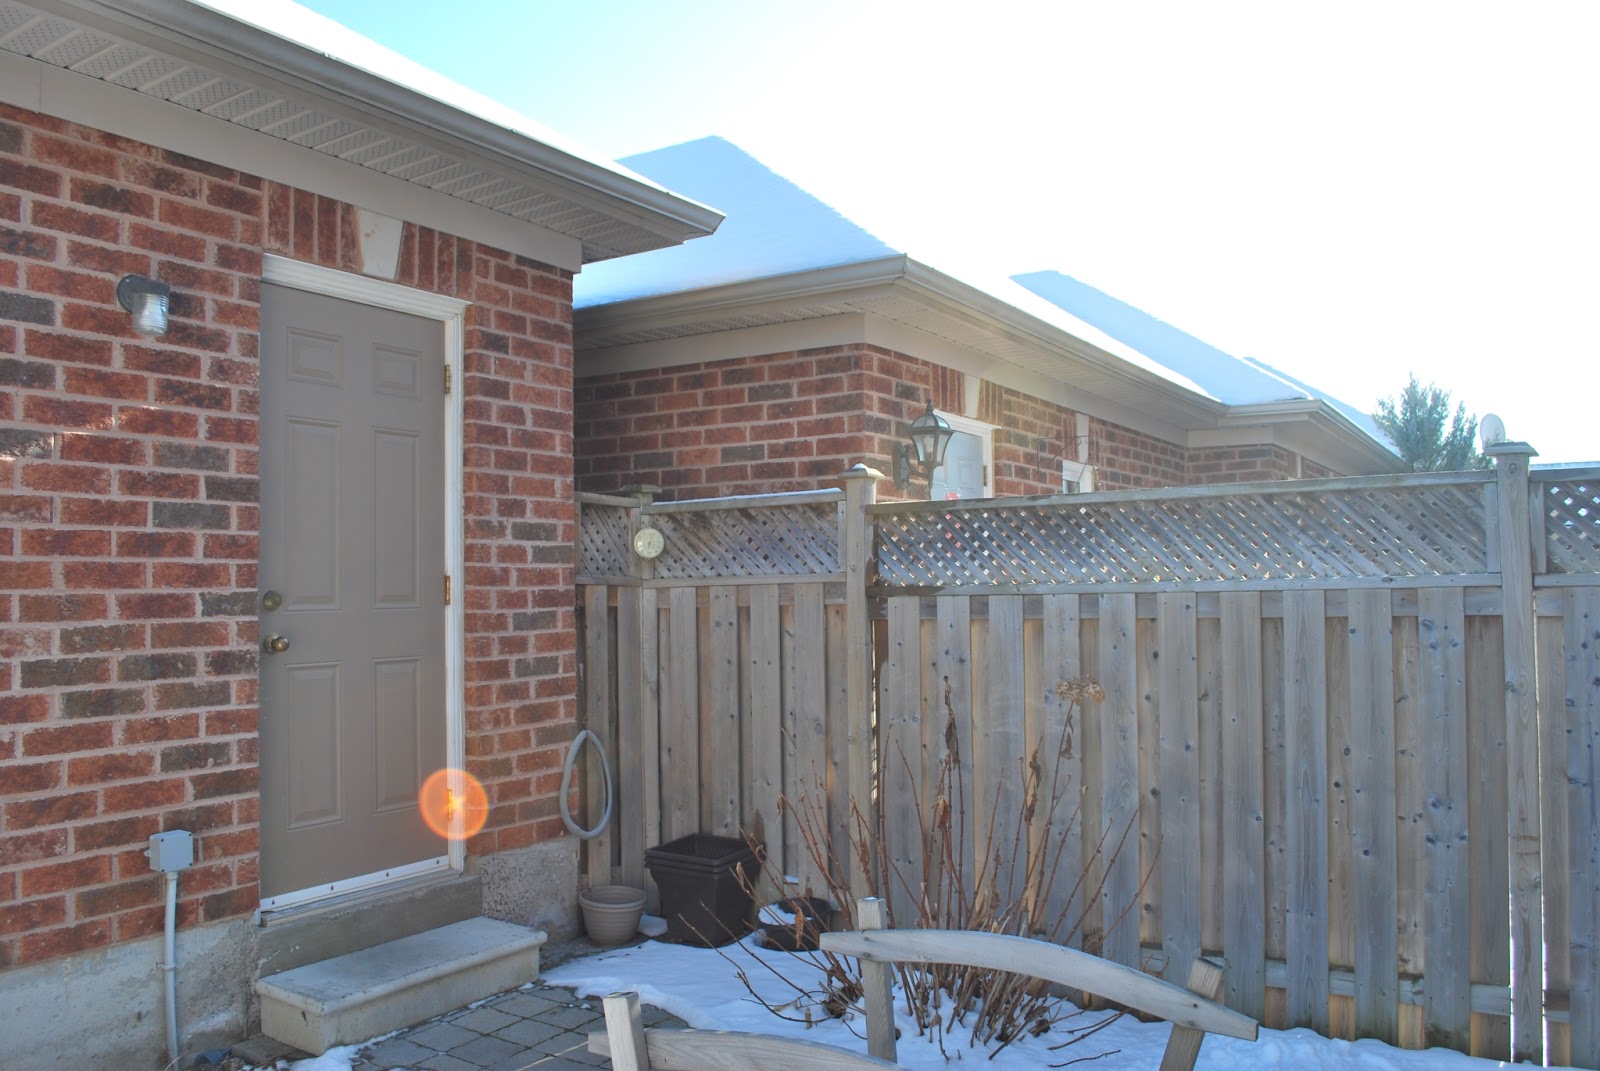
I ran all five images into PhotoDirector 5, selected the 0 step image as my base image, and got the following result:
(Hey, that doesn't look too bad!)
Next up, I moved the tripod to a different spot in the yard and repeated the process, again taking five pictures at differing exposures.
 |
| -2 step |
 |
| -1 step |
 |
| 0 step |
Already that 0 step image looks pretty overexposed.
 |
| +1 step |
 |
| +2 step |
I selected the -1 step image as my base image this time, since it would look too overexposed even after going through the HDR assembly line.
Final result:
Next scene:
 |
| -2 step |
 |
| -1 step |
 |
| 0 step |
 |
| +1 step |
 |
| +2 step |
This time I used the +1 step image as my base image, and also made some tweaks in PhotoDirector to make it look better.
And finally...
 |
| -2 step |
 |
| -1 step |
 |
| 0 step |
 |
| +1 step |
 |
| +2 step |
Use the -1 step image as my base, and viola!
 |
| Also uploaded to DeviantArt, before I get copyright lawyers running after me for copying from myself. |
 (Hey, that doesn't look too bad!)


Comments
Post a Comment